deniv
CB750 Member
Hey everyone I have made a few posts here and there but I haven't properly introduced myself. I live in the Austin, TX area and recently acquired a 1982 CB750sc Nighthawk for $400. It was in pretty rough shape, but I am stubborn and determined to clean her up and put her back into service. Although I've been riding bikes belonging to friends and family off and on for the past 10 years, I've never had one of my own or worked on one. Besides a doing a full brake job and modifying a condenser fan to replace a dead one, I don’t have a lot of experience working on my truck either besides easy things I can just swap out.
I knew going into this that it was going to be a ton of work and that I would end up spending more on parts/repairs than I did on the bike itself, but I wanted something I can be proud of. I recently got married and we are waiting a while before having kids so I am also trying to take advantage of the free time I have left before going down that path.
Now for the build so far: I have been bad about taking pictures and haven’t managed to take ones of every little thing, but it’s better than nothing.
My two goals in order of priority: 1. Get it running by focusing on repairing one system at a time 2. Get it drive-able with the same focus on systems as #1
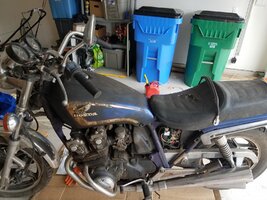
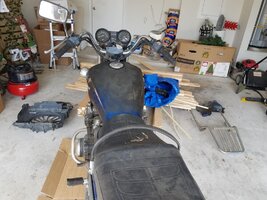
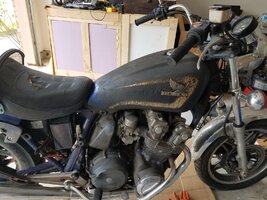
Here is the bike the day I got it (just over 1 month ago):
What I’ve done so far
Fuel System:
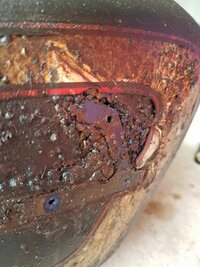
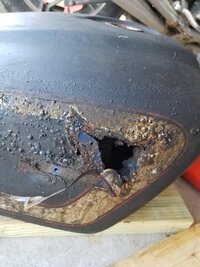
The master cylinder was broken and the brake lever bent. Clearly the fluid spilled all over and the PO never cleaned it up because there was gooey black crap was all over the tank and after wiping it off I noticed that the paint was eaten away. In addition everything is super dirty and in need of a lot of TLC.
The brake fluid appears to have ruined the tank. When I went to remove the right side emblem, the metal almost gave in. No way was that getting patched. The inside also looked disgusting.
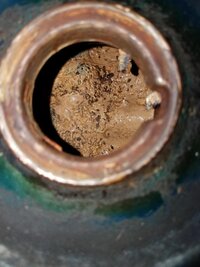
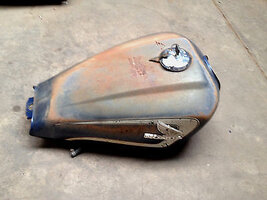
Fortunately I found a suitable replacement on eBay somehow for $70 with shipping. The petcock valve even appears to be in great shape.
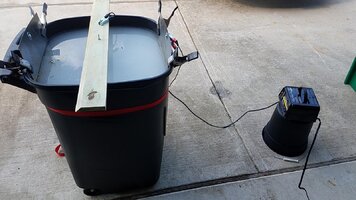
I started restoring the tank by dipping the entire thing in a trash can electrolysis tank for about 3 days. I didn’t bother fitting an anode on the inside of the tank. Part of me sort of wishes I had because it would be cleaner, but I wanted to seal the inside with Caswell anyway and it allegedly bonds well to surface rust. That said, my method of dipping the whole thing managed to remove a lot of the rust inside.
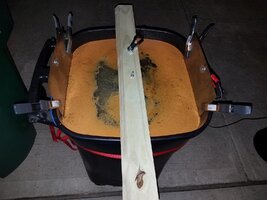
After it came out of the tank, surface rust appeared immediately. Not a big deal though because I still needed to strip whatever paint remained after the electrolysis bath using aircraft remover. The worst part was getting the decals off. A heat gun and a razor blade made it slow, but doable.
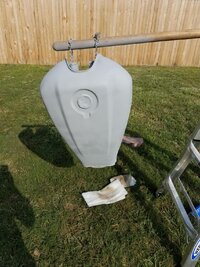
After stripping the paint, sanding the small amount of surface rust that appeared, and bodyfilling some small dents, it was time to paint. I have been taking my time with it and still need to wet-sand and then clearcoat it, but this should give you a good idea of how it will look.

Next I pulled the carbs and airbox which was a major pain in the ass to do for a first-timer. The carb boots to the engine and to the airbox were hardened and may as well have been vacuum cleaner attachments so I ordered a set of brand new ones.
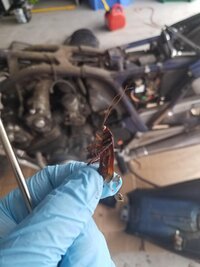
The airbox was pretty bad. It wasn’t as bad as some of the pictures I have seen of people finding rats nests, but I did find this little guy.
I cleaned the airbox out thoroughly and replaced the filter. My wife wasn't very pleased one day when she came home to it soaking in our bathtub.
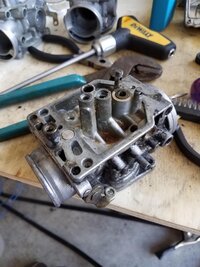
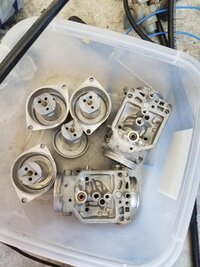
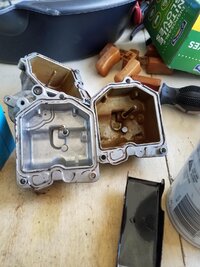
Next I went to work on the carbs. I’ve always heard people complain about having to clean their carburetor so I thought it was some terrible process, but once I figured it out I really didn’t think it was too terrible. The worst part was taking them apart. The corrosion in them made it very difficult.
Once they were apart I found that the process of actually cleaning them was almost relaxing.
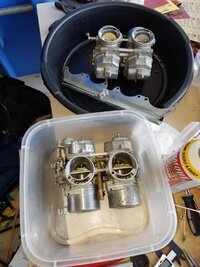
I replaced all of the components with a rebuild kit from 4into1 and reassembled them using brand new stainless steel hex bolts. I also replaced all of the air-cut offs and the accelerator pump.
This carb rebuild guide I found was a Godsend. I followed it line by line as a newbie and was successful. I highly recommend it to anyone with a similar set of carbs. http://www.cb750c.com/publicdocs/SeanG/Honda_Carb_Manual_revG.pdf
Apparently I can't attach any more photos so I will continue this post as a reply
I knew going into this that it was going to be a ton of work and that I would end up spending more on parts/repairs than I did on the bike itself, but I wanted something I can be proud of. I recently got married and we are waiting a while before having kids so I am also trying to take advantage of the free time I have left before going down that path.
Now for the build so far: I have been bad about taking pictures and haven’t managed to take ones of every little thing, but it’s better than nothing.
My two goals in order of priority: 1. Get it running by focusing on repairing one system at a time 2. Get it drive-able with the same focus on systems as #1
Here is the bike the day I got it (just over 1 month ago):


What I’ve done so far
Fuel System:
The master cylinder was broken and the brake lever bent. Clearly the fluid spilled all over and the PO never cleaned it up because there was gooey black crap was all over the tank and after wiping it off I noticed that the paint was eaten away. In addition everything is super dirty and in need of a lot of TLC.
The brake fluid appears to have ruined the tank. When I went to remove the right side emblem, the metal almost gave in. No way was that getting patched. The inside also looked disgusting.


Fortunately I found a suitable replacement on eBay somehow for $70 with shipping. The petcock valve even appears to be in great shape.

I started restoring the tank by dipping the entire thing in a trash can electrolysis tank for about 3 days. I didn’t bother fitting an anode on the inside of the tank. Part of me sort of wishes I had because it would be cleaner, but I wanted to seal the inside with Caswell anyway and it allegedly bonds well to surface rust. That said, my method of dipping the whole thing managed to remove a lot of the rust inside.


After it came out of the tank, surface rust appeared immediately. Not a big deal though because I still needed to strip whatever paint remained after the electrolysis bath using aircraft remover. The worst part was getting the decals off. A heat gun and a razor blade made it slow, but doable.
After stripping the paint, sanding the small amount of surface rust that appeared, and bodyfilling some small dents, it was time to paint. I have been taking my time with it and still need to wet-sand and then clearcoat it, but this should give you a good idea of how it will look.


Next I pulled the carbs and airbox which was a major pain in the ass to do for a first-timer. The carb boots to the engine and to the airbox were hardened and may as well have been vacuum cleaner attachments so I ordered a set of brand new ones.
The airbox was pretty bad. It wasn’t as bad as some of the pictures I have seen of people finding rats nests, but I did find this little guy.

I cleaned the airbox out thoroughly and replaced the filter. My wife wasn't very pleased one day when she came home to it soaking in our bathtub.
Next I went to work on the carbs. I’ve always heard people complain about having to clean their carburetor so I thought it was some terrible process, but once I figured it out I really didn’t think it was too terrible. The worst part was taking them apart. The corrosion in them made it very difficult.
Once they were apart I found that the process of actually cleaning them was almost relaxing.
I replaced all of the components with a rebuild kit from 4into1 and reassembled them using brand new stainless steel hex bolts. I also replaced all of the air-cut offs and the accelerator pump.
This carb rebuild guide I found was a Godsend. I followed it line by line as a newbie and was successful. I highly recommend it to anyone with a similar set of carbs. http://www.cb750c.com/publicdocs/SeanG/Honda_Carb_Manual_revG.pdf
Apparently I can't attach any more photos so I will continue this post as a reply

