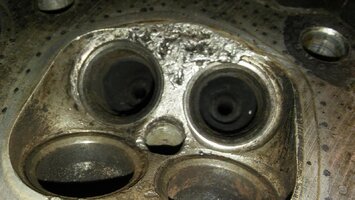
Try not to damage the seats themselves, 3 angles there and the middle one is it. I would be trying to see if the damaged cylinder has a good seat at the damage before wasting time on the rest of the head. Looks like something blew up on the head but not the other parts, like OEM head was changed to the damaged one.
You lucked out bigtime with the water not hitting the bores.
Nothing wrong with soda at all if it gets you the cleaning you want, the lower the destructive you can get the better if it still cleans. Your work is very acceptable. Glass pretty much what everybody uses in shops here. More aggressive. Can't use it like on piston ring grooves.
The seats are always rough and exhausts are worse. The problem being, the norm is to lap the valves in trying to get seal back, often you can get most or all intakes to but not the exhausts, the dents being too deep. The seats are no issue but the valves are only surface heat treated and once you lap enough to visibly remove any material at all off the valve you are past the heat treat and on super soft steel that won't hold a valvejob at all. 5K miles and valve is burned. Why you can grind the seats but not the valves, replacement only.
You'll be needing to cruise Youtube for all the valve lapping info you can get. Car or bike, the process is the same.