• Enter the April CB750 Supply gift certificate giveaway! It's easy... Click here, post something, and you're entered into the drawing!

"Newbe" '78 CB750A project

dan-oh

dan-no
Messages
19
Reaction score
0
Points
1
Location
Harrisburg PA
I'm new to this forum, but I would like to begin by saying thank you for your help. I'm appreciate what you have done for me already, and I hope I can give back some time. The vacuum diagram from Dirtdigger has saved me a lot of head scratchin'. My questions have been answered on previous posts on this sight, so far.

I have a hondamatic that I acquired at a local auction. It fires on all cylinders when fluid is sprayed into the carbs. I took the carbs off and cleaned them up. #1 bowl is a mess. I used a piece of fuel line to seal the main jet port and stainless steel wire to hold the float axle up. Cleaned up the tank. I'm almost ready to put fuel in it and see if this bike is worth the love and money that it needs. This is the most wrenching I've done on a bike in 20 years...and likin' it.
 
The old girl started right up. Not running well, but running...with the choke fully on. Worse as it warmed up. The carb boots are hard, and probably leaking too badly work.
So, now to buy carbs and boots. At least #1 carb should be replace. I see 28mm carb sets on Ebay. Are there alterations that have to be made to use 28mm carbs in place of the 24mm originals?
 
Whats wrong with the carb? You can make the bigger carbs work but you will have to do without the vacuum idle up assembly or try to retrofit it over to the new carbs, dont know if it can be done or not. You will have to decide what carbs you are going to use before you buy new boots because the auto boots are different from the rest.
 
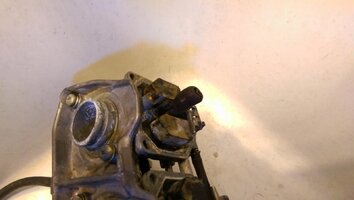
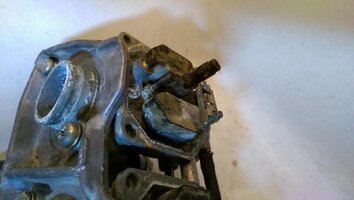
When I figure out how to post pic, I will do that. Until then let me say that that #1 carb is a mess...white and dark corrosion, a chunk broken where the main jet screws in, float posts broken. There was a repair done with an adhesive (maybe JBweld) that had broken down. The repair came off during my cleaning. I slid a piece of fuel line on the broken main port, and it worked for the 15-20 of running time that i have used it so far. I'm very nervous of trusting this for long.
Thanks for the info on the bigger carbs. I'm now off the fence about staying with the original carb set up. Usually, I'm a fan of staying with the original design.
 
Last edited:
Your biggest issue with the bigger carb will be getting the high idle actuator to fit/work. Original carbs for the auto are more scarce but if you can find a set it may be worth it as it will be a direct swap then. Check in the FAQ i think there is a place that shows how to post photos.
 
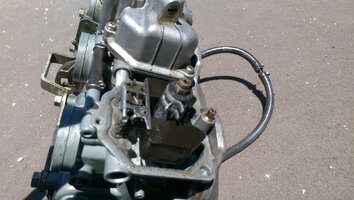
IMAG1000.jpgIMAG1005.jpg
 
Instead of JB weld on that float pivot post you could drill a very tiny hole through it and wrap some very tiny stainless steel wire around the the pin.
 
I was afraid to drill into anything. I didn't break anything so far. It looks so rotten that I sympathize with the person who broke this.
I was able to use the corrosion divots to attach the wire. No pic of that.
 
A quick update...The "fuel line repair" in the carb bowl didn't work so well. The fuel line swelled in this situation, to the point of interfering with the float. It worked long enough to ride the bike around the property, and determine what I'm getting into with this project.

There is a possible title issue. I'm waiting for a title before I spend any money on the bike.
 
Thank you amc49. I cut a piece off the gas tank overflow for inside the carb. I let you know how it works out.

That link is very interesting also. I had considered a similar repair on my own. The carb is destined for discard anyway. The price of this kit is reasonable when you consider the details and specs are worked out for you. But, another carb is probably a better bet...I think there are a few out there when I'm ready to pull the trigger on a parts order. (the list is growing)

Hoping it all works out. It is a luxury machine compared to the sportster.
 
Keep an eye on ebay for carbs, they do come up once in a while.
 
I got a title!!!

While waiting for the title, I ran about 700 miles on the temp tag. I don't have the vacuum choke system hooked up, so manually choking at stop signs has been interesting. (I have a new appreciation for this vacuum design.) The (clear) tank overflow line is working for the carb repair...so far.
Cruising at 55-60 is smooth. Windjammer fairings are huge and almost ugly to look at, but the old memories have come back of how well they work.
Ten years of sitting wasn't good for the old girl, but it gets better with every fill up.
Family obligations are in the way of much more progress, until riding season is over and I'm cooped up in the garage.

Thanks guys for the help so far. I'm sure I be back when I order parts.
 
Dan for the hard intake boots get some Wintergreen oil and 91% Isoprpyl alcohol. 4 parts alcohol to 1 part Wintergreen, soak your boots in it for a few days it will sofften them up and they will seal much better also makes installs very easy. I will never struggle with hard boots again.
 
Careful, wintergreen has a high content of essentially aspirin in it, one ounce is like 150 aspirin worth of salicylic acid, don't get it on your skin.

FYI, you can use regular motor oil to soften rubber.......................what I use on like side cover pop grommets. It won't repair any cracking already in the rubber of course.
 
Thanks for the info k2750tracy and amc49.

Sorry guys, for not posting what I did to the boots.(I thought I did).

I used Murphys oil soap to clean them. Then neatsfoot oil applied with a paint brush. Wiped off the excess (there wasn't much excess) a few days later. This seamed to help, but I'm not sure what will happen long term. These products were chosen because they were on my shelf (in a few layers of dust).
 
Nothing works near as well as the wintergreen oil solution on the intake boots, it makes them soft and pliable and installing the carbs is so easy, just push them on. amc49 I've tried motor oil and a wide veriety of other oils and remadies with VERY limited results. If you have not tried the wintergreen oil soak i highly recomend it, you will be amazed with the results and the time and aggrivation you will save yourself. The use of gloves when handling most solutions is always recomended.
 
Back
Top